Pages

Wednesday, December 22, 2010

You're making me Dizzy


December is always such a busy time of year, but I've been wanting to play along with a few more challenge blogs this month. So I killed two birds with one stone with this layout!


Candy Shoppe Designs have a challenge to use up all your unwanted X, Y, and Z's which automatically got me thinking about using them as a photo mat (I used a few more 'unwanted' letters too, like V and Q). And then I used a few more for the title too!


And Scrap the Girls has a challenge to create a layout using one set of complimentary colours. My choice...... red and green. I know my base cardstock looks a little turquoise here, but it looked a lot more green when I chose it! It might be the Studio Calico white mist which has made it magically 'change'?!


This funny picture of my daughter was taken at a playground, but my general theme was summed up nicely in my long title. Whether it's through joy or frustration, sometimes she really does make me dizzy :-)

Tuesday, December 21, 2010

I've been featured by Shimelle!


Have you just popped over because you've seen my Guest Blog Post on Shimelle's blog?
If not, go over and read it here, then the rest of this will make more sense!

Here's what you can do next:
  • Click here to see all my December tags in all their glory. Close ups, details, and products I've used are all in this post here.
  • Click here to learn how to make the cute little origami stars I've used on one of my tags, and in the layout you've seen on Shimelle's blog.
  • Click here to be taken to Jessy's blog and the amazing tutorial she did on making that origami Christmas tree I used on one of my tags.
PS. My December Giveaway is currently still open. Actually, I posted the winner five days ago, so if I don't hear a response from her in the next 24hrs I'll pick a new winner. Enter it here.

Origami Stars

There is nothing new under the sun (Ecclesiastes 1:9)

I had this little tutorial all made up about a month ago waiting for the right time this week to hit publish. And then the same tutorial (by someone else obviously) was promoted on the Cosmo Cricket blog just recently!! Never mind *LOL* Keep reading if you want to hear my version, or click here to read a different (probably better!) version.  

I want to show you how to make some cute little origami stars that make great embellishments on your scrapbook pages or cards. 


Start with a strip of patterned paper. Sorry - I don't exactly measure, but it's about 0.5 inch wide and needs to be about 8inches long. The measurements don't really matter. The thinner it is - the easier it is. And the longer it is just ensures you'll have enough to make your star. I start with a long length and then just cut off the excess when I've finished.


Bend it into a loop as shown in the photo above. My final star will have the white pattern showing, so just take note if your paper is double-sided like mine which way you need to bend it.


Slip the long end through the loop and tighten it all up.


It's essentially like tying a neat knot in a piece of paper :-)


Fold up the short end, and tuck it in. You can trim it if it's too long.


If you flip over your star it will look like this (above)


Now fold down the long end to align with the straight edge of the bottom of the star. The paper will literally guide itself into which angle it wants to fold - just follow it!!


Flip it over and fold it over a couple more times until you're satisfied with the bulk of your star.
Cut off any excess and tuck the loose end under one of the folds (just like at the beginning)


At this point you've simple made a fancy-looking pentagon. To make the star shape I use my thumb-nail to make a crease half way along each straight side.


With a bit of manipulating and pinching you should end up with your final star looking something like this. But don't worry if you don't get it the first time, it's a little fiddly and might take a bit of practice. I certainly had my fair share of duds!


Here's the final product on my scrapbook page. All I did was glue him on, and add a few friends :-) These are all papers from the Basic Grey Jovial collection, and I made this layout for my Guest Post on Shimelle's blog, so you'll have to go there to see it in full!


But here's another layout I made a little while ago for Handmade by Suzanne using some lovely My Mind's Eye So Sophie papers.


I tried making a few different size stars for this one, and certainly found that the smaller stars are much easier to make look nice in the end. The big ones tend to look a little boxy and messy. But maybe I didn't practice enough?!

Sunday, December 19, 2010

Sun-kissed


To create some consistency between my two layouts I do each month, I make sure I use the same collection. For October's layouts I have used the same kit, so they have a very similar colour-scheme and embellishments, even though I haven't used the same papers. You can see the first layout I did here.


The kit I'm using is the fabulous Napa Valley - the November kit from Studio Calico. I have to say that I wasn't 100% convinced with this kit when I saw it in the reveal, but now it's in my hands I have well and truly changed my mind.


I do love the softer muted colours, and even though most of these papers could easily pass for masculine, I think they work well for girl pages too. And I love the extra touch of texture the embossed Jenni Bowlin cardstock adds.


Can you read that journaling?! It says "I've just noticed her nose and cheeks are covered with a sprinkling of freckles" which is one memory I have of Munchy in October.

And have you noticed the sprinkling of Making Memories bling 'freckles' across the page?!

Saturday, December 18, 2010

Tim's 12 Tags of Christmas 2010

Warning: very image heavy
...... and long!


So I'm going to say something that pretty much everyone in the scrapping world knows........ Tim Holtz is a genius! And I particularly love this time of year when he does his 12 Tags of Christmas.


I followed along last year for the first time (see my efforts here) and so I knew what a treat I was in for this year.


 As usual, there were some of my tags I was quite happy with, and some..... not so much! All of Tims were amazing of course :-)

But as Tim says... he doesn't expect you to copy his tags directly, but more just to gain inspiration from, or to learn new techniques. Because not only does he make wonderful tags, but he gives outstanding tutorials which make it incredibly easy to learn from.

Let's have a look at them one by one shall we?
In each of these, I have posted Tim's tag first, followed by my own attempt (but I'm sure you'll be able to tell!!) and I'll link you up to Tim's blog post/tutorial.

Tag One

Not having the rickety house die, I took my inspiration from the method he used of layering paper strips (or grungeboard in his case) before cutting it into the shape he wanted. I simplified it quite a bit!

Tag Two

Again, not having the right materials to make my own ink-pad I settled for just taking my inspiration from the design.


Tag Three

This one was a bit easier to emulate :-) I liked the idea of covering chipboard with tissue-tape (something I hadn't thought of previously) and used some 7 Gypsies tape instead.

Tag Four

This was the one I had the hardest time with. Despite Tim's tag looking a-mazing, I just couldn't get happy with mine, even after a second attempt.


Tag Five

I found this one a bunch of fun. I don't think I use my stamps nearly as much during the year as I do for Tim's tags!

Tag Six


This was my absolute favourite from Tim's tags. Maybe because I have a real deer infatuation at Christmas time. But I think the colours are just lovely. And I adored the technique he used for the background. It had never crossed my mind to stamp onto my embossing folders.

Tag Seven

I think this was the tag that I got closest to as far as imitating it directly. I love this one too.

Tag Eight

I used the double-stenciling trick he taught us here, but used butterflies instead. Are butterflies Christmassy?!!!

Tag Nine

This was another easier one to copy, so I just put my spin on it. I realised at this point how many of my tags were heading down the turquoise/red path.... but it's just a pretty combination don't you think?

Tag Ten

What a fantastic idea.... to emboss your plastic packaging! I told you this man was a genius!

Tag Eleven

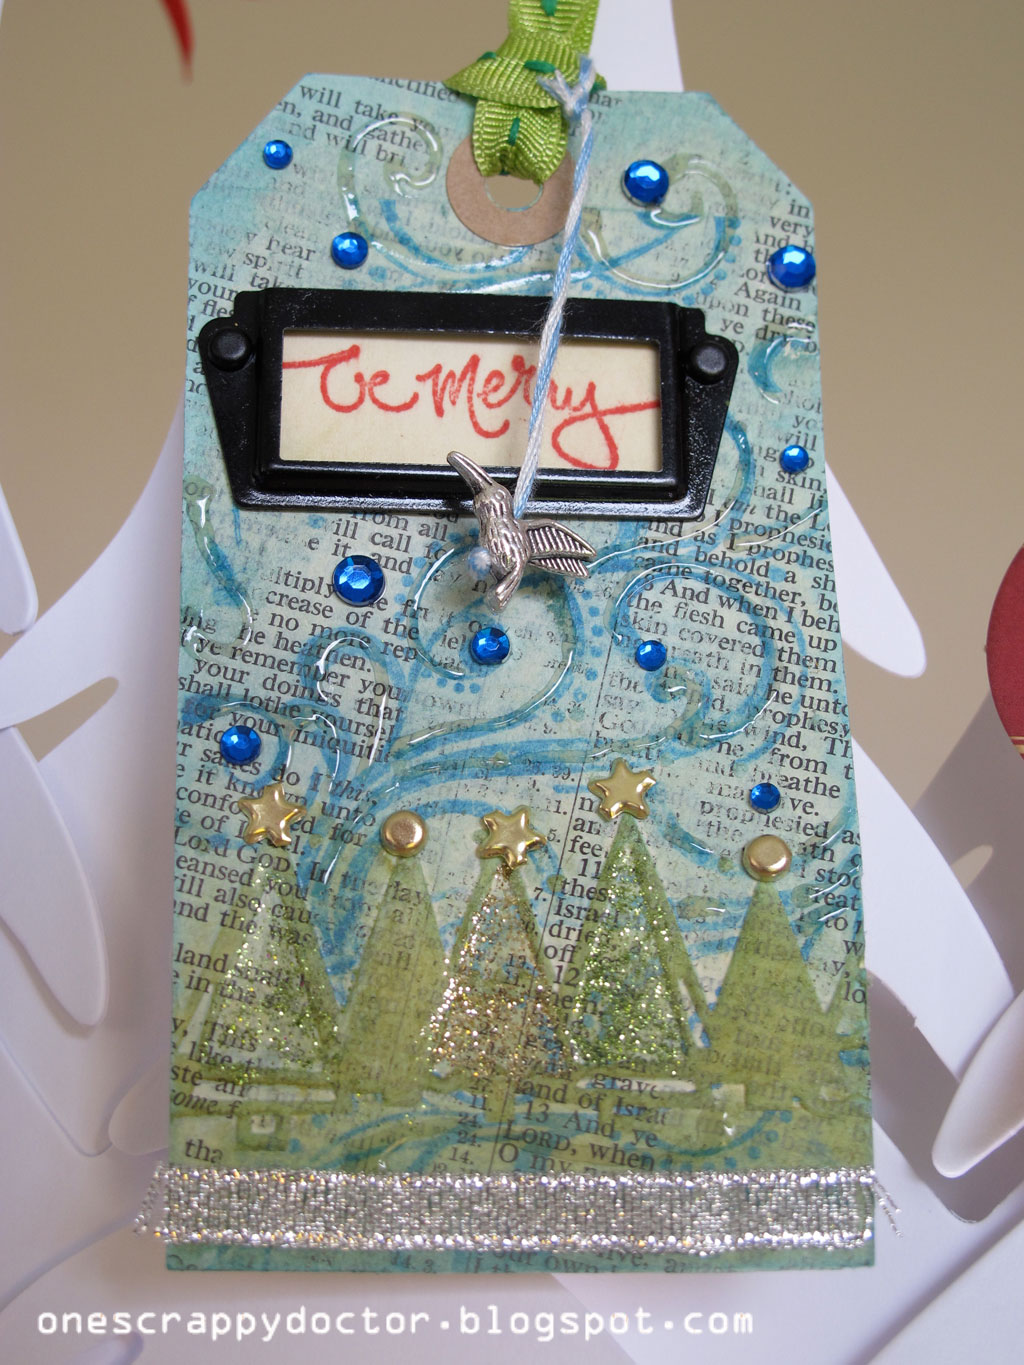
I used the stamping on my embossing folders technique from tag 6 for the background of this instead of the clear embossing that he taught in this tutorial. But kept the trees, and the book plate.

Tag Twelve

Lucky last. I just went with having a big bauble as my focus and ignored the rest really!

Well that's it for another year.
Did you make it this far to the end of my post?!

LinkWithin

Related Posts with Thumbnails