Pages

Showing posts with label You Tube. Show all posts

Friday, October 2, 2015

Studio Calico Wink Wink Reveal

Wow, I'm feeling so happy to back contributing to Studio Calico again this month after a little hiatus from my favourite kit club. And even more happy when I found I genuinely love so many of the products in the Scrapbook Kit, Add-On Kit and Embellishment Kit that I was sent to work with. The whole Wink Wink reveal has just gone live and you really must go over and check it out, but perhaps you would like the Trophy Husband to share his thoughts on the products first?!!


Now that's out of the way, let me show you what I've managed to make so far and tell you what I've been loving.


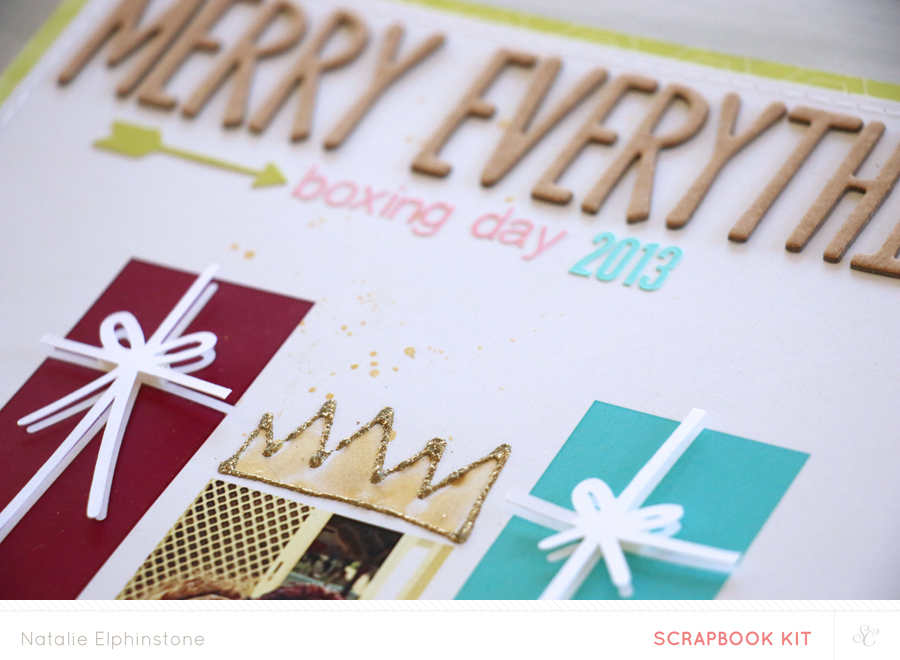
I always start off with my Main-Kit-Only layout because it's nice and easy to do with the fully packed kit and because after that it just becomes too tempting not to combine them all together and go wild ;-) So I went a bit hybrid and whipped up this simplistic but dimensional layout.


The little bits and pieces that finish off a page are always my favourite (shiny gold puffy asterix anyone?!) but before we get to that point it's the big focal points that steal the show. I think everyone on the Creative Team has fallen in love with the yellow fold-out paper. It's a 12x12" piece but I figure I'll get a lot more mileage out of it all cut up... so that's what I did!


My second layout documents Bethany's recent 9th birthday. Given it was only 2 weeks ago I'm feeling pretty darn proud of myself for having gotten it in an album already ;-)

I started off mainly using the Main Kit too, but like I said, it got too tempting not to add in just a couple of other touches from the Add On Kit called LOL.


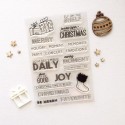
But my big fun bit of play time came when I got to run a couple of the new stamp sets through their paces and managed to get them both on this page together. In fact it was the Beginning and End stamp that inspired the subject choice as I thought the 'beginning of 9' vibe could replace the journaling (I know ... shock!) as the photo pretty much speaks for itself. Let's be honest, these cake cutting photos all look fairly same same after a while don't they? So it's just the date that I need to make clear so I can figure out what birthday it was in the future.


And what better way than to make the date big and bold and smack it right in the middle of the page?! I'm deeply in love with the new Jack number stamp, the size and font are perfect!


I didn't intend for my third layout to be a double-pager. I completely finished the right hand side as my layout and left the journaling until last. I had planned to add a couple of lines underneath my title and call it done. I'm not sure why it didn't click earlier that I was going to have wwaaaaayyyy too much to say on the topic of breastfeeding but it's obvious that I do. LOL!! So I ended up writing out everything I wanted to say (for now) and printing it on another piece and then tried to match up embellishments so that it seemed like a cohesive double layout.


That might help explain why there's two "happy's" as well. The little blue stickers on the pineapple tag spelling out happy above the glittery blue ones was my original title. When I decided to go ahead and add another glittery 'happy' on my second page to draw them together I couldn't peel these ones off without ripping the tag slightly. So the two happy's were there to stay!


The double layout was created exclusively with products from the Add On Kit LOL, the Embellishment Kit BRB and a couple of printable journaling cards.


My fourth and final layout (for the reveal anyway) came about when I decided I really needed to test out a couple of the new dies that are being released. The new set of Emoji dies are super cute and the progression of shock, grimace and cool-as-a-cucumber faces actually suited my layout subject perfectly. As you can tell by my lengthy journaling once again, I needed to unleash a few thoughts on my recent job hunting adventure and those emoji faces really help tell the story.


The assortment of arrows in the top left corner of my layout are another set of dies and I know these are going to come in handy a lot, especially when I do things like my Bible Journaling. I'm always tucking in arrows there, pointing to verses and whatnot. 


Anyway, that's it from me right at this second. The reveal is live and there's plenty more fabulous new products hitting the shop as well. I've got a couple of tutorials going up on the Studio Calico blog this month too. The first one is up already and shares my hints and tips for using that Block Wallah stamp that comes in the kits. But watch out for another one coming soon too.


Happy Scrapping
Photobucket

Saturday, May 2, 2015

National Scrapbook Day 2015

There's so much happening around the blogosphere tonight, just love the excitement that's poured out about our mutual love for all things memory keeping and papery. I've already done some blog hops and chats and created things. But right now I'm going to be here at Big Picture Classes.


There's a free classroom that just opened up where I'll be amongst some seriously talented women challenging you in different ways. Here's the project I created for my challenge - see if you can guess what it could be?!


You might need to go ahead and watch the video I've put together of how I created the card which will explain exactly how and what the challenge is!


And if you're thinking with all this crafting you're going to need some new supplies then check out the limited edition World Scrapbooking Day kit from BPC. Not only is it totally gorgeous (totally need that stamp!) but it ships FREE anywhere in the world! That's enough to make me push the 'purchase' button ;-)


 (there's also a very similar kit, with the same free shipping clause over at Studio Calico as well!)

So I hope you'll join me over in the Big Picture Classes classroom for some serious fun!
But in the meantime...
Happy Scrapping!

xx
Photobucket

Saturday, March 28, 2015

Lisse Street Reveal


It's reveal day over at Studio Calico and I'm rather excited that I get to play a part again this month. I'm fairly certain when the head-honchos decided April was the month to release the Australia stamp and die set that they also decided it would make the most amount of sense to send it to the only Aussie on the team to play with! Seems logical... and I couldn't agree more :-) 


Of course, what good is a stamp and die set if I didn't have some pretty papers to use it with as well? So I was lucky enough to also score the Lisse Street Main Scrapbooking Kit which I used to create this Handbook spread with. 


I'm desperately trying to complete my 2014 Handbook with all the monumental events of the year, and our September holiday to Queensland certainly counts as one of those! With lots and lots of photos to include it actually extends over multiple pages, so this became like a front-cover of sorts for the whole section.


I turned the Australia stamp and die into an interesting little add-in as it's just a touch too big to include into a 4x6" pocket (if you include Tassie in it's rightful place!) but that's cool by me because I've been tucking in lots of these types of inserts throughout my Handbook. I've pretty much decided that the Attacher die will be my most used die of the year.


I've since added another photo and some journaling to the back of the insert as well, but at the time I took the photo of my spread I hadn't quite decided what I was going to do with it. 


With so many pretty patterned papers in the Scrapbook Kit I wanted to include as many as I could onto this spread, but that meant when it came to my journaling I had to debate with myself how I was going to put it in. I didn't think I could journal directly onto the paper because the patterns are a little busy and I didn't think I would be able to read it. On the other hand, I didn't want to journal onto plain paper and stick it over the top because it would cover it all up. So the idea of compromising by journaling onto vellum was born. Rather happy with that!


Anyway, the Lisse Street Kits and all the Add Ons are on sale for now at Studio Calico. Check them out here. 

Or if you want the up-close and personal walk through, and you've been hanging out for the return of The Trophy Husband, then you're going to want to watch this....


Oh and PS. Did you notice that the Australia stamp and die also comes with a couple of cute extras like this koala? There's also a kangaroo and a fish and a boomerang. It's so fun!

Happy Scrapping!
xx
Photobucket

Friday, November 28, 2014

Park Avenue Reveal


It's Reveal Day at Studio Calico and the new December Park Ave Kits are now on sale. Here's a look at the Main Scrapbook Kit to get you in the mood for what you might expect....


How would I describe this kit in one word? Vibrant!
The colours in this is what really grabs your attention and sparks the imagination. And that splash of purple dotted throughout is really unique and massively awesome if you ask me. I know it's not everyone's cup of tea, but I think it makes this kit stand out above the rest and adds an unexpected element in an otherwise more traditional colour scheme of pink, teal and white.

And here's a real-life walk though of what it looks like in person, as well as the 3 Add Ons... as described by the Trophy Husband and Moriah. What's he going to say this time? I honestly have no idea - I actually haven't even watched it this time around. So you're in for as much a surprise as me!


Here's what I've done with Park Ave...


Obviously I'm inspired to scrap some Christmas pics at this time of year, and I've got such a backlog from the photos I took last year that I'm starting there!


This layout came together really quickly once I started working with the Digital Templates that Shanna Noel designed this month. They're technically supposed to be used as card templates for your Project Life albums or Christmas cards, but I wasn't the only one on the Creative Team that couldn't resist the temptation to blow this up to an 8.5 x 11" size and create a layout with it. They're super cute aren't they?


I've used the one on the left for another layout I'll share later on in this post too.
But whilst I was perusing the digital shop I came across something else that immediately had me wanting to put together a certain layout. Here's what I was inspired to make...


I'm sure all of us as parents have that massive pile of kid art that we've been given that we're expected to keep forever. I love my kids and I love their art. In fact I've even got a hashtag on Instagram where I help catalogue it all (#ElphieKidsMakeStuff) But in all honesty it's just not possible! There are those special pieces though that you really do want to treasure and I've been trying hard to help incorporate them into my own layouts and PL spreads as a way of immortalising them.


So when I saw the Project Life Digital Stamps with their crafty vibe I knew they would be perfect to create another page featuring some spectacular kid art ;-) Because I already had the photo printed off I chose to convert the stamps into cutting files instead and used them here for my title and the scissor embellishments.


Because the Main Kit was packed with so many things I wanted needed to use I was able to very easily whip up a third 'Main Kit Only' layout - this one inspired by my very favourite paper, the colourful one with all the houses on it.


Yes it's true, sometimes a single product can steer the whole direction of a page! So I started with the house paper and the idea that I wanted to journal about this wonderful city of Melbourne that I live in, and then everything started coming together. First I noticed that one of the Printable Journaling Cards included a quote about a city, and then I also saw the chance to create a skyline of high-rise buildings with the Card Kit Digital Stamps converted into cutting files (again!)


But as much as I love the Main Kit I also couldn't wait to get stuck into the Add Ons. They are just gorgeous. I'm really finding it hard to chose a favourite, and think I should give up altogether. Check them out...


I started working with Ritz, added in some papers from the Main, and then the embellishments from Waldorf (namely those cork snowflakes that everyone on the CT is raving about). Because I just had to work them into a layout somehow, so I made this page about Moriah's latest obsession with the movie Frozen. Totally works right?


Lots of journaling on this one - documenting the events of her birthday just gone. Because I feel like I'd been a bit slack with the amount I'd written on some of the others, so I over-compensated! But it tells the story, and that's what it's all about for me.


The photos scored a bit of digital love in the form of some stamps from the Lizzy Birthday Set which obviously suited the occasion perfectly. I'm seriously considering knabbing the acrylic set for some real-life stamp action because these would make some cute birthday cards don't you think? 
Or if you're in the mood for birthday scrapping, there's also an alternative set that's a bit more funky, called 'Happy Something'. Love the brush script on this one. Another difficult decision. Might just get them both ;-)


My last layout for the month was another hybrid attempt. These Digital Templates will make it so much easier and quicker to get some Christmas scrapping done in the busy season. And I'm ridiculously in love with the bright colours and ability to add so many photos on this particular template.


Although I didn't find the space to add any journaling, I think having 6 photos is probably enough to get a good sense of the story behind the occasion. It really captures the essence of the happy event doesn't it? And I've managed to get 90% of the family on the one page which is usually quite a remarkable feat for our gatherings!


Being a Christmas layout I couldn't resist the temptation to add some gold touches - especially since we're all wearing gold crowns in the photo. I created my own hand-drawn versions with Gold Glitter Zing and coloured in with Gold Mister Hueys. Loving the sparkle this adds.

And if you're thinking you love gold as much as I do, and you're fascinated with the latest craze of scratch off cards, then you might want to check out this 'Upcoming Year Card Set' designed by Marcy Penner. I could easily see these being used as a little desk calendar, or in my Project Life album.


And that's my lot for the month. And for the year really. I've still got one or two little projects coming to various blogs during December which use these kits, but ultimately this is the end of the line as far as the current CT are concerned. Who will be around next year, and what 2015 holds is yet to be announced. I think we're all holding our breath on that one! But I don't think it will be long before announcements are made.

In the meantime.....
Happy Scrapping!
Photobucket

Sunday, November 16, 2014

Invisible Ink and Homemade Watercolours

There's nothing more exciting than watching my girls take a real interest in wanting to learn how to scrapbook 'just like Mum'. I love that they're excited about crafting and more excited by the fact that they want to do it with me. And they're eager to discover new techniques too. That gasp of joy when I teach them something and they see it come alive before their eyes is soooo rewarding!


This week I showed them a couple of simple but fun techniques and taught them how to create their very own bright and vibrant Christmas cards. That's right, these two cards you see were made by my 8 year old (on the left) and 4 year old (on the right). Not me. Except for the trimming and sewing etc.


I call this my invisible ink and homemade watercolour technique and it's perfect for crafting for kids. You'll see why if you watch the video.


Meanwhile, it's also not bad for us adults too. I love the effect of this and can easily see myself creating cards along the same lines. In fact, I already have! Remember this card from my recent sketch feature on the Studio Calico blog? A bit more technical, but it's basically the same idea.


I love that my kids chose out these bright colours to create with. They're not hindered by thinking about traditional Christmas colour schemes. They just want what they like and for Moriah that always ALWAYS involves purple, and for Bethany it's not so specific - just something pretty.


Although I have to admit, I've been creating my own fair share of Christmas projects with lots of pink and aqua too. They're my favourite all year round so I don't see why I shouldn't include them into my holiday crafting as well ;-)


As a parting gift I've linked up all the supplies we used to create these cards in the list below. I'm still going crazy for Kellie Stamps Joy Set for all it's wonderful typographic sentiments, and I can never have too many stars in my life.

Happy scrapping!
Photobucket

Supplies:


LinkWithin

Related Posts with Thumbnails