Pages

Monday, December 23, 2013

The Story of Studio Calico

What an amazing week it's been!
First of all there came the announcement today that I have been named as one of the Scrapbooking Memories Masters for 2014 and I couldn't be happier. This is something that I've thought about applying for the last couple of years but the timing has never been right. And this year when I was contemplating it again so many of you gave me such encouragement to give it a go. I know I wouldn't be here today without you all :-)

But before the Masters announcement there was this.....

I'm still pinching myself to see if I'll wake up from this dream.. but I was invited to become part of the Studio Calico Creative Team! Eeek and excitement!! I feel like someone handed me a Golden Ticket (and yes, I'd definitely compare Studio Calico to the Willy Wonka Chocolate Factory of the scrapbooking world!!)

In a flurry of Christmas business I received my first lot of January kits last week and have been crafting up a storm to get all my layouts done because already it's time to reveal the sneaks...


The January scrapbook kit is called "Copper Mountain" and is inspired by a ski-resort. It's full of woodgrain, neutrals and primary colours and is perfect for scrapping masculine pages and winter photos. However.... that doesn't mean you also can't scrap summer girly themes (because that's my real life right now) and so that's what I did!


The two photos above are from my pages made with the Main Kit - see those puffy hearts? Yep. Officially in love! And a return of the classic Studio Calico Noah alpha.. this time in woodgrain sticker form. It doesn't get any better than that ;-)


As for the Add-ons, well I'm still deciding which one is my favourite, so I just went ahead and made a layout with each of them. Above is my page using Add-on 3: "Slingshot", and below you'll see a sneak of my page using Add-on 1: "Freemont Glades".


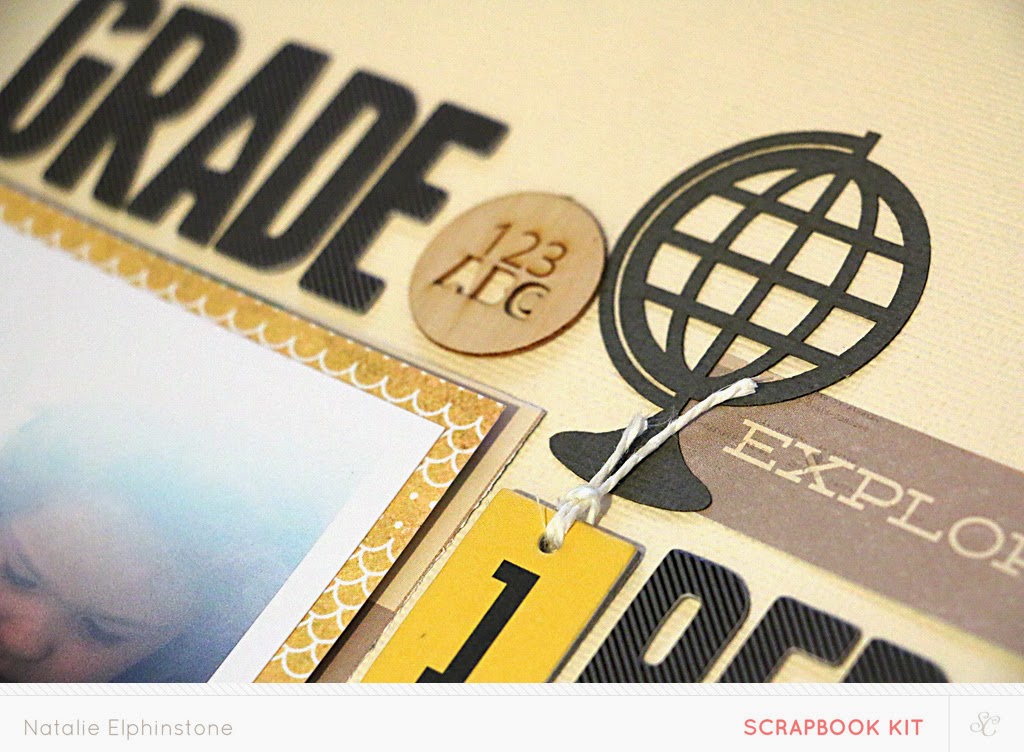
But the winner is probably going to be Add-on 2: "High Point" because it's school themes come at the perfect time for end-of-year celebrations and ready for the commencement of the new year. I can't wait to show you what I've done to include some important memorabilia on this layout!


Thinking of starting a subscription? The January kits are sure to sway you. The Creative Team (even the 'old' ones who've been there for years) are all abuzz with the claims this has made it into their Top 5 favourites of all time! The reveal is on the 28th and it can't come fast enough ;-)

Photobucket

Sunday, December 22, 2013

Tutorial: a Mixed Media Christmas Album

This post first appeared on the Scrapbook Creations blog here!

There are many different varieties of Christmas journals out there, probably the most popular being Ali Edwards "December Daily" and Shimelle's "Journal Your Christmas" where the idea is to keep some kind of record of what you do in the Festive Season. But today I'm not going to share ideas on what you can include in your journal, I thought instead I would show you how I put together my front cover. Along the way I'll show you how to use a variety of different wet mediums that you may not have tried before.


The base of my journal is a Spiral Notebook by Basic Grey. It's got lots of great inserts, but it's front cover is designed to be augmented so starts off as plain chipboard with a splash of colour just near the spirals. Obviously that was not going to cut it, so I set to work.


Step 1: I measured and cut a piece of October Afternoon Make It Merry paper to cover the chipboard. I adhered it using Gel Medium which is great for this kind of thing. It's a thick sticky gel like substance that dries clear and can be used as both an adhesive and a sealer, similar to Mod Podge. It sticks super-strong so will be perfect for ensuring my paper doesn't peel off half way through December! I applied it using a paintbrush for even coverage, just make sure you wash it soon after otherwise you'll never be able to paint with it again ;-)


Step 2: I used a palette knife to spread some Impasto Paste through my favourite star stencil. Forgive my home-made container for it... I broke the original one many months ago! This product is similar to texture paste, and is super thick (like the consistency of butter) so will give you a very raised design, if you have the patience to let it dry! My brand dries clear but you can get varieties that stay white. 


Step 3: Once dry I painted the whole thing with a layer of Gesso. I did this for two reasons, firstly because my Impasto Paste dries clear and I wanted to make sure you could see the stars, and secondly because it's going to act as a sealer so I can add even more wet mediums on top. If I didn't add the Gesso and went straight to my next step, the water would warp and buckle the paper underneath. After this photo was taken I used a wet wipe to dab off some of the excess Gesso so you could see more of the paper design underneath.


Step 4: Everybody's new favourite toy... Gelatos! Gelatos look and feel like lipbalm, but they're water soluble. I used my three colours and scribbled with each one in a different section of the cover. I sprayed it with water to dissolve the colour, then smeared and smudged it around just with my fingers. You can see how it's settled in the lower parts and left the raised stars relatively blank. Perhaps I could have stopped there... but it is Christmas after all and this is the perfect time to add some glitter!


Step 5: To get the glitter to only stick to my stars I first retrieved my stencil and laid it back down over the design. I then used a paintbrush to smear on some wet glue (any PVA-type glue will do) through the stencil and sprinkled it heavily with extra-fine glitter.


To finish off I simply added my embellishments. This mainly consists of stickers from the October Afternoon Make it Merry collection, some of which are raised up on foam tape for extra dimension.


Unfortunately I didn't think to take any photos of how I coloured my numbers, because they were a mini-adventure on their own. Again it was a process of painting the plain chipboard numbers first with Gesso as a base and then adding layer upon layer of Twinkling H2O's to build up a nice vibrant hue.


Are you making a Christmas album this year? I would love to come and check yours out so please leave a comment and a link. Yes you can read that as "I might have finished the front cover but I've not done anything inside and I need the inspiration"!!

Photobucket

Friday, December 20, 2013

The Story of Giving

Carrying on with my Polly! Scrap Kits posts this week I've got another card to share with you. Gosh, anyone would think I've turned this into a stamping and cardmaking blog with all the projects I've been posting lately. I assure you I've still been making lots of layouts which will all make it up here in good time!


What I love about this Christmas stamp set from Polly is that it's specifically designed with us Aussies in mind. No snowflakes or chestnuts or mittens to be seen... instead more relevant sentiments like "Fun, Sun and a BBQ"! Now you're not going to find saying like that on Christmas stamps anywhere else are you? LOL!


I think many of these stamps are going to be absolutely perfect for when I finally get around to working on my December journal. You may have seen my front cover tutorial on the Scrapbook Creations blog last weekend, but I'm yet to actually make any headway into filling it up. Eeekk!


But in the meantime I went to town with silver embossing those stars everywhere on this card. You know how I love stars right? Once they were embossed I used painted on some spray ink straight out of the bottle to give it a watercolour look. I also used the "Christmas is a time for Giving" sentiment to top it off.


That reminds me, I also haven't finished the Christmas shopping....
Hhhmmm.....

Photobucket

Wednesday, December 18, 2013

The Story of the Happy Christmas

One of the things I love most about the JBS collections that Jenni designs is that they're timeless. So even though this card is made from the Christmas 2012 collection you would never know for looking at it right?


I've paired it with some newer products that aren't at all Christmas related and yet still look at home here such as the Silver Feather rubons, and the Happy Speech Bubble flatbacks. And that gold leaf? Well... I have to admit that just fell off our Christmas tree.. it's not a scrapping product at all. Just consider it upcycling!


To satisfy the arty in me I've used some gesso through the exclusive star stencil that came in the June papercrafting kit to add some background detail. But the star stamp that came in the November kit would also work well with some embossing powder.


Not long to go now until Christmas. I've really got so much still left to organise! Eeekkk.... starting to panic.

Photobucket

Sunday, December 15, 2013

The Story of the Embroidered Star

Following on from the success of the Polly! Scrap Kits Blog Hop last week I was invited to try my hand at some of their other gorgeous stamp sets they have in stock. That was an offer too good to refuse so I'll be showing off my projects in the next couple of weeks!


First of all I took the Hot Colourful Christmas stamp set and created the card above. I know... it's not even Christmas themed! But that was the direction my creative muse took me in, and I find it much better to obey than try and make it into something else to suit the 'rules' LOL!


So many possibilities with this set right? You can make lots of different combinations of phrases, and the numbers make it really useful for your Christmas journals. But it was actually the numbers inspiring me to think of birthdays that got me off track in the first place. They're all individual stamps, but I lined them up on my acrylic block and stamped them in pink to create a bit of a border to my card.


Next I piled on all my embellishments. Commonly my choices are made by what's simply within arms reach and that's why I find it helpful to leave little piles of embellishments in dishes on my desk. If I see it I'm much more likely to use it. So I've got a Prima flower, JBS rubon feathers, and iron-on embroidered star patch (!) and those lovely skeleton leaves my dear friend Lizzy gifted me with. 


I also took the 'birthday' stamp from the set and used it with chalk ink on a scrap of vellum. Cant seem to get enough of vellum these days. Perfect for everything - you can even see I've used it to rub on my gold feathers before cutting them out. But of course it's the stamps that really make this card something unique. I can't wait to show you what I've made with the next set. Stay tuned!

Photobucket

Saturday, December 14, 2013

Page Drafts Christmas Sketch Release


The Christmas scrapping continues here as I whip myself up into a festive frenzy! I really love this time of year!


Today is the release of the new bunch of Christmas sketches from Page Drafts, and to celebrate we've put together a sleigh-ful of inspiration from a bunch of designers around the world.


Em makes such wonderful sketches that really drive me to create, so I couldn't help but play along and I chose this particular sketch below to inspire my page.


I struggle a little with the concept of round photos so I scrapped with my usual square Instagram pic, but apart from that I tried to stick to the sketch as closely as possible. With so much detail included in the sketches it's really not hard to find direction, and you don't have to do a lot of thinking for yourself! Especially useful in this busy season where creative time is commonly in short supply ;-)


So I added some clusters of October Afternoon banners top and bottom, plenty of bling and sparkle of course (how fabulous is that American Crafts gold glitter corrugated cardstock I mounted the layout on?!) and a fair sprinkling of Studio Calico paper and Evalicious tags.


The layout tells the story of our family Christmas last year. For the first time ever we stayed put and celebrated at home just the 4 of us for Christmas Day. Usually we are travelling to the country to spend it with family as I have been blessed with many years of not having to work the Christmas week. Unfortunately that wasn't the case last year, and it won't be the case this year either :-(


However, I have to admit that in some small way it was nice to be able to just relax at home and not be worried about getting to the next location on time. It was also lovely to be able to watch the kids open their presents from underneath our own tree for the first time too. And it didn't mean that we skimped on all the 'essentials'... we still had a proper roast turkey and all the trimmings for lunch as this photo proves!


Now this is only one of the fabulous Page Drafts sketches that have just been released. You ought to see what the other designers have created based on the other designs. Check out all the details on the Page Drafts blog here, and get inspired to do a little Christmas scrapping for yourself today!


Photobucket

Wednesday, December 11, 2013

The Story of the Home Alone Christmas

It's time again for another round of the latest challenge at CSI: Color, Stories, Inspiration where I'm a Special Deputy this month. The common theme linking all the challenges for December is Christmas (not that you have to follow the theme of course) but I do have a bunch of last year's photos still waiting to be scrapped.


Case File #101 looks like this:


Love the cool colour scheme we had to work with, although I found it a little difficult to get the right tone of green unfortunately. I think this would look particularly awesome if you have White Christmas photos in your collection. Here in Australia though Christmas is generally a boiling hot day spent in your t-shirt and shorts around a BBQ perhaps, so I didn't have any photos of snow!!


The evidence I incorporated into my layout (the embellishments) included: numbers, silver accents, something shiny, circles and Christmas accents. And perhaps frames if you count all those square Ali Edwards stamps I used in the top half of my page as 'frames'. But perhaps not ;-)


And for my testimony I stuck with the rather obvious prompt to 'journal about the holidays'. I wrote all my journaling on a tag hidden behind the photo, not because it's anything private, but more just for space issues. I thought originally it might fit underneath the 25 but after I painted in a few stars for their pop of colour I decided I didn't want to crowd it in beside them. 


I wrote about spending Christmas at home last year just as our own little family of 4 (rather than on the road visiting with all the extended relatives) which was quite a different experience for us. A bit more relaxing I have to say, but certainly misses out on lots of positives too. More on that in my next blog post. Stay tuned ;-)

Photobucket

Monday, December 9, 2013

Polly! Scrap Kits Blog Hop

Welcome to the Polly! Scrap Kits blog hop. Today we're celebrating the fabulous exclusive stamps that Polly stocks. You can get your hands on a new stamp every month from the kits, or in sets which are sold separately.


There are some fabulous Guests along with the Polly Design Team showcasing some of the stamps today. You should have made it here from the talented Kayla's blog. But if you're lost, or you stumbled here by chance then I suggest you start at the Polly blog and work your way through from there. Leave a comment on any of the blogs in the hop to go in the running to win your choice of the 3 stamp sets in the Polly store!


For my project I took the stamp that came exclusively in the November kit and used it on this card. The stamp includes the sentiment "Proud as a Peacock" which I've used to create a banner out of, and also a small peacock feather. These are a hot trend right now and I had lots of thoughts running through my mind on how I could use it.


But ultimately I wanted to do something a little different with the peacock feather part of the stamp so I turned it into a digital cutting file and used it to cut this delicate feather from some glitter card!  That way I could turn it into a large feature point and really highlight it, rather than risking it getting lost in the business of the other embellishments. 

In case you're wondering why I've gone a little nuts mixing my peacock sentiments with teacher appreciation ones... it's because my daughter's teacher is called Miss Peacock!! This card will be making it's way to her at the end of the year. I hope she likes it :-)


The next stop on the Blog Hop is the fabulous Kate. You'll just love what she's created to share with you. And don't forget to leave a comment here for your chance to win your choice of a Polly stamp set of your own! The giveaway will close on Monday 16th December.

Good luck!

Photobucket

LinkWithin

Related Posts with Thumbnails