

A tutorial today on how I created the cloud background you see in the layout above, and a rundown on my design process and how this layout all came together. I'm thinking I might do this once a month (the design process steps I mean, not necessarily a tutorial) as I had a good response when I did this the first time.

Firstly I chose four colours of Distress Ink that would look good together. Using an ink applicator or sponge you first want to put a layer of colour down the very bottom edge of your cardstock. All I do is load up my applicator by dabbing it on my inkpad, then apply it to my cardstock using a sweeping upward motion.

Next, create your cloud-shaped stencil by simply drawing a freehand design on a scrap piece of paper/card and cutting it out. Easy right?!

Lay this stencil down the bottom of the card, over the green edge we've just done. And with the next colour of ink use the same technique to add a new cloudy layer. Remove the stencil and this is what you'll see.

Repeat, repeat, repeat with alternating colours until the whole background is filled. You'll want to shift around your stencil, flip it over, use the other half of the paper we cut, or cut another stencil in an effort to make it more interesting and 'random'.
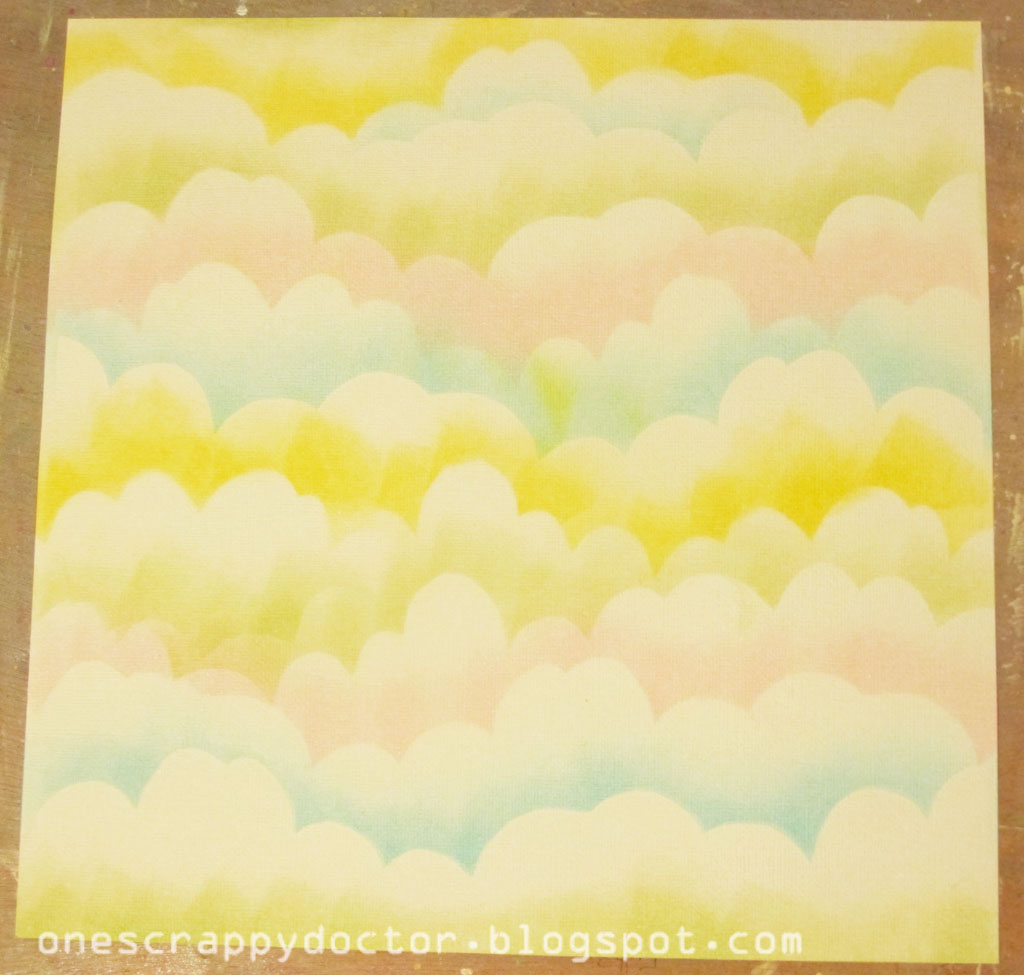
At this point I decided my ink colours were too vibrant for the soft dreamy look I was going for, so I sprayed a light coverage of Studio Calico Mister Huey's in White over the whole page! This was perfect because it softened the colours and also added some opaque droplets.
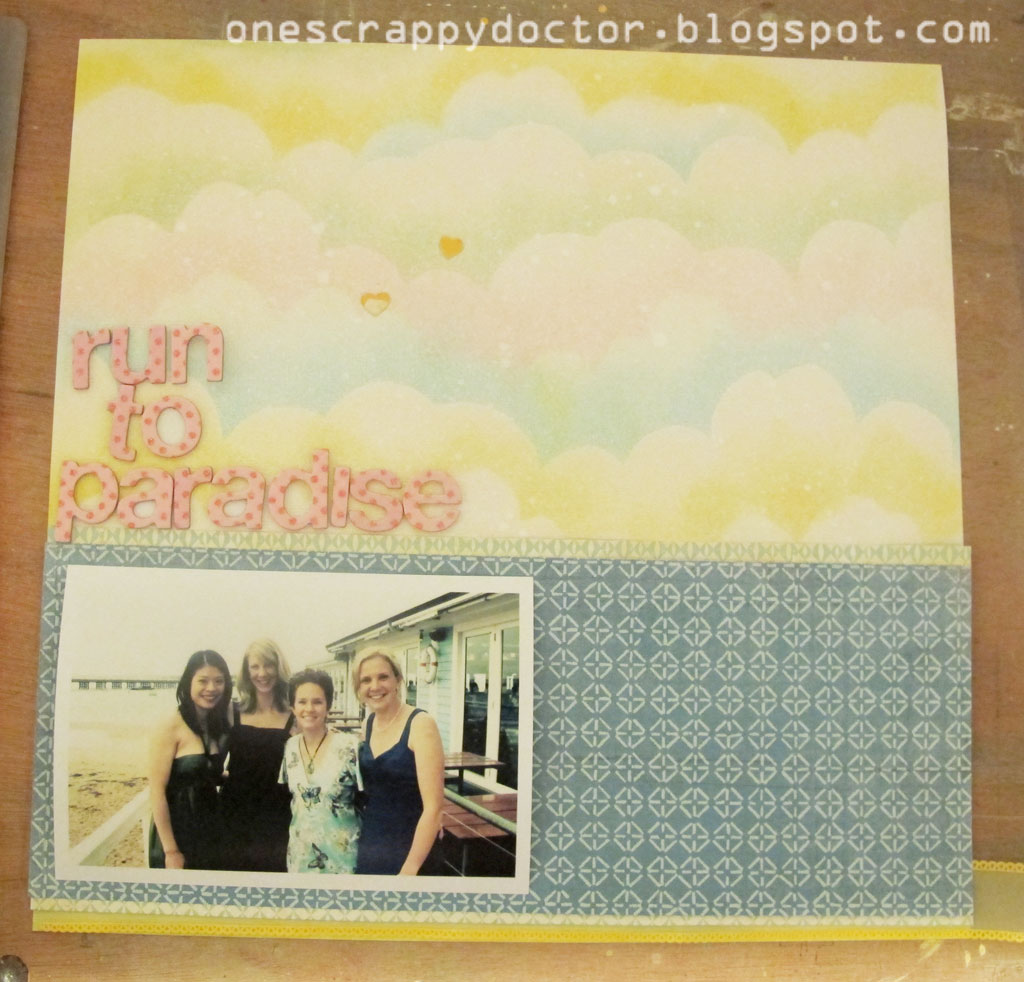
As far as the actual design of the page goes, I cheated on that front by scraplifting this amazing layout by April Foster in the Studio Calico gallery. And I started with my February Studio Calico kit to make paper and embellishment choices easier for myself (although I did end up adding a few things). I commonly self-enforce kit scrapping because otherwise the choices are too overwhelming for me!

I wanted some frames around my journaling and thought these American Craft chipboard Accents would be perfect, except for one thing... the colour. But that's easy fixed with a coat of White Distress Crackle Paint.

So it's all starting to come together now. Just needed a few extra embellishments, and to fill those windows with journaling. Stick it all down finally and voila, my layout is finished!
One of my scrappy resolutions this year is to use up more of my old stash, and one particular bunch of supplies that I find is ever increasing and never diminishing is my packets of alphas. At some point you run out of viable words to make from them, and yet it's still difficult to throw them away!

So I simply stuck a strip of random letters and numbers across the top and bottom of my page for no other purpose than because it's interesting, and uses up my supply! Now I'm trying to come up with more ways for inorporating them into my layouts.

The song "Run to Paradise" by the Choir Boys always makes me think of these girls - three of my best friends. We lived together in college as we were all studying medicine or physio, but we still knew how to party, and this was one of the songs that was gauranteed to get us out of the dancefloor :-)

This is a recent photo of us together - just last month in fact, at another doctor-friend's wedding. It was so much fun, and yes, there was lots of dancing involved!
Anyway, I hope you found this interesting, and perhaps even inspiring in some small way :-) Please link me up if you ever try any of these ideas out!
Fabulous tutorial & page! I love the way the mist makes the finished project look- and those distressed frames- lovely!
ReplyDeleteI remember making my mom a gift of hand decorated stationary as a child/teen as a gift- it was so pretty- although I don't know that she ever used it!
Thank you so much for taking the time to do this. I'm excited to try the technique!
ReplyDeleteHave a super day! Amy