

In the video you'll see my process of how I tackled this layout. It's the complete deal, from start to finish (well.. actually... minus the end part where the batteries ran out on my camera and so you don't get the final embellishments and journaling. Sorry!) But all the important parts are there. What you'll also notice is what an indecisive scrapper I am. I didn't really plan this layout before I turned on the camera so you see the real deal. You see me try out different embellishments in different places, then think they're not working and move them... only to move them back again!
Feel free to just sit back and watch the video and see for yourself what I've done. But I'm also going to explain some of the techniques in more detail here too.

The main technique focus on this layout is the background colouring. Here's how I did it.....
First I swiped some gesso onto my background paper with an old credit card. The credit card trick means it goes on quite thin which will allow it to dry almost instantly and creates a waterproof layer for the next step. Then I spray some water lightly over the gesso, flick on some mist, then spray more water onto it to move the colour around. It will pool in certain areas and create a lovely water-colour effect that's so popular currently.
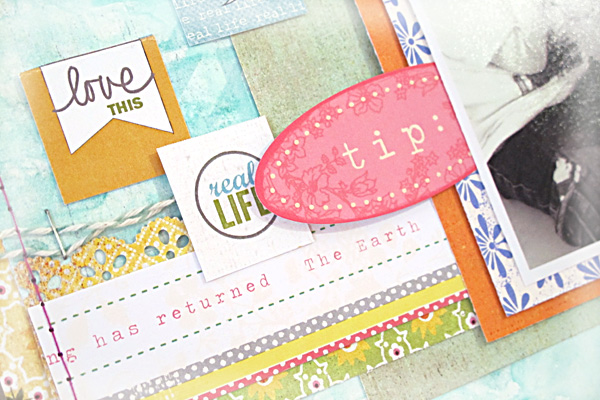
To create more depth in my background I used Distress Ink that's a slightly darker colour than my water-colour and sponged it on through a stencil in random areas. It just gives it slightly more interest I think. But the real star of the show is of course the fabulous Evalicious Real Life Page Tabs that are scattered across the page. I tried to challenge myself to use a whole packet on one layout and I didn't even come close! There's just too many in a packet if you cut them all up like I did. Plus I was only really choosing the ones that matched the colours on my page ;-)

Because this page is quite flat I felt I needed to add some extra texture to it (that's how my brain works anyway!) So I included some twine stapled to the background layers and finished it off with messy stitching on my machine. My journaling came last and I added it to the top and the bottom for balance. Sorry.... pun intended!

Supplies:
It all works so well - saw it over at Evalicious & I LOVE how you used sooo many of the tags!!!!
ReplyDeleteNice work!
ReplyDeleteWatched the video - thanks so much for sharing!! Such a gorgeous layout!
ReplyDeleteGorgeous layout - loving all the little tags. Thanks for the tips!
ReplyDeleteSuch a great page...I love the background and will definitely go and watch the video when I get home. LOL...you are certainly not the ONLY indecisive scrapper...I know I can sometimes sit on a project too and try this and try that! Scrapbooking Reality!!! ;-)
ReplyDelete