Pages

Showing posts with label hybrid layout. Show all posts

Tuesday, January 5, 2016

Jot Issue 12

Along with all my Christmas projects that appeared in the latest issue of Jot Magazine (see my last blog post) I also had a couple of other non-themed projects featured including this double-page Project Life spread.


I do as many double-page PL spreads as I do double-page layouts, which is to say... not a lot ;-) I have to admit I cheated a little by making them 9x12" pages so that I didn't have quite as many pockets to fill, and I made sure I picked a subject where I had a tonne of photos to include. A weekend trip away with the family to Phillip Island was perfect because we packed SO many adventures into those two days it was ridiculous!


I essentially broke our trip down into 5 different activities that I had photographed, and I included 2 photos from each making sure I had all the family members covered. I numbered them accordingly and used that same number when I wrote out my corresponding journaling. I hope it still makes sense to me later on down the track!


Because all the pockets are a square 3x3" I had to trim down my traditional cards to make them fit, but as a bonus, the Studio Calico Pop Art Project Life Kit had a set of 3x3" die cuts which are the circle and heart shaped cards you see. I've included this spread straight into my regular 12x12" album and I'm really enjoying the variety this one brings.


One of my favourite galleries in every issue of Jot has to be the story-telling one. I'm pretty sure I've submitted a layout for this gallery every single time because you know me - I've always got a long story to share!


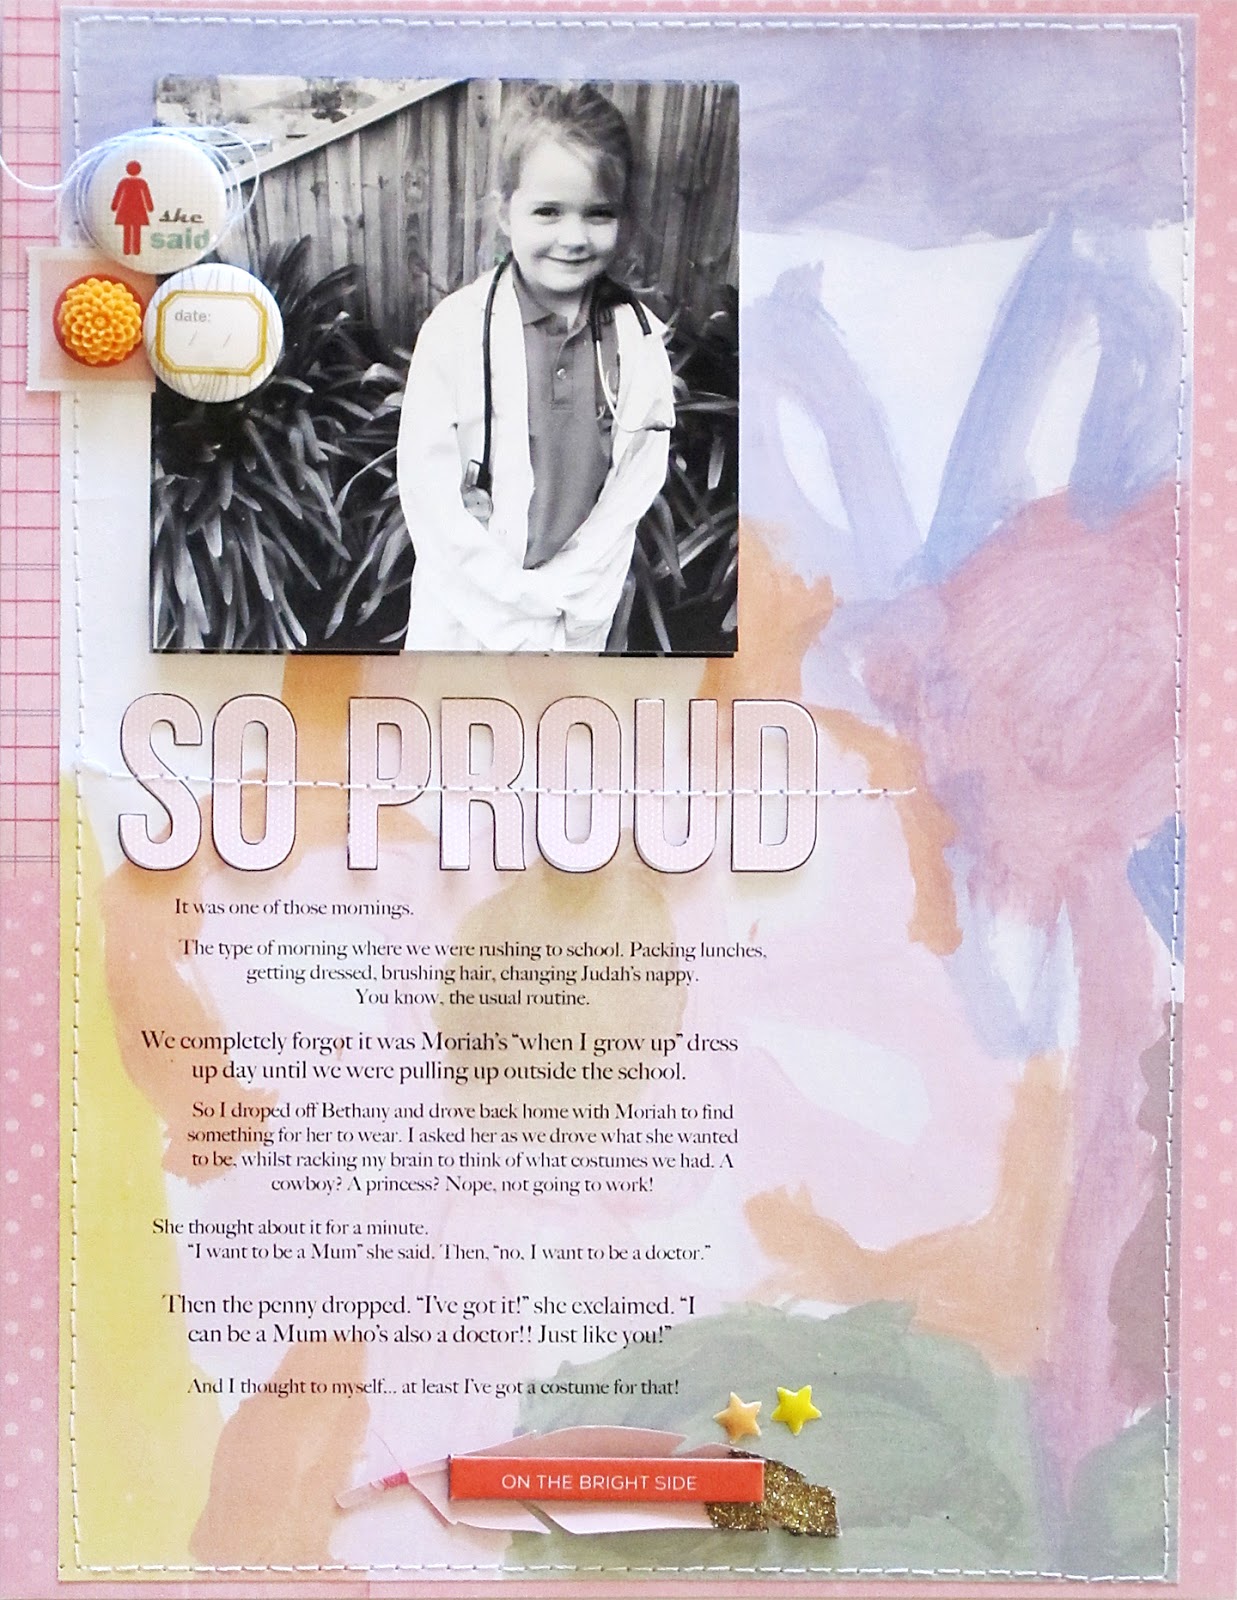
In this issue the theme was "When I Grow Up" and I had the perfect photo to scrap since Moriah had also recently had this same theme as a dress-up party at school. What was even better was that whole event actually HAD a story to be told (which you can read about if you can be bothered getting up close with my journaling!) which was above and beyond what my normal caption would have been like for a photo such as this.


I'm not scrapping a lot of layouts these days so when I do I find it a good opportunity to pull out some of my old supplies and mix and match different things. But actually what I decided to do this time was go a little hybrid and use a painting that Moriah had done for the background paper. It seemed quite appropriate. I scanned it into the computer and dropped down the opacity before printing it back onto some card. Now I feel like I've achieved something even greater with this layout - a good story and some kid-art recorded in the same place!


You can see these layouts and all the other fabulous inspiration in the pages of the FREE online issue of Jot Magazine right here. Happy reading!

Photobucket

Friday, October 2, 2015

Studio Calico Wink Wink Reveal

Wow, I'm feeling so happy to back contributing to Studio Calico again this month after a little hiatus from my favourite kit club. And even more happy when I found I genuinely love so many of the products in the Scrapbook Kit, Add-On Kit and Embellishment Kit that I was sent to work with. The whole Wink Wink reveal has just gone live and you really must go over and check it out, but perhaps you would like the Trophy Husband to share his thoughts on the products first?!!


Now that's out of the way, let me show you what I've managed to make so far and tell you what I've been loving.


I always start off with my Main-Kit-Only layout because it's nice and easy to do with the fully packed kit and because after that it just becomes too tempting not to combine them all together and go wild ;-) So I went a bit hybrid and whipped up this simplistic but dimensional layout.


The little bits and pieces that finish off a page are always my favourite (shiny gold puffy asterix anyone?!) but before we get to that point it's the big focal points that steal the show. I think everyone on the Creative Team has fallen in love with the yellow fold-out paper. It's a 12x12" piece but I figure I'll get a lot more mileage out of it all cut up... so that's what I did!


My second layout documents Bethany's recent 9th birthday. Given it was only 2 weeks ago I'm feeling pretty darn proud of myself for having gotten it in an album already ;-)

I started off mainly using the Main Kit too, but like I said, it got too tempting not to add in just a couple of other touches from the Add On Kit called LOL.


But my big fun bit of play time came when I got to run a couple of the new stamp sets through their paces and managed to get them both on this page together. In fact it was the Beginning and End stamp that inspired the subject choice as I thought the 'beginning of 9' vibe could replace the journaling (I know ... shock!) as the photo pretty much speaks for itself. Let's be honest, these cake cutting photos all look fairly same same after a while don't they? So it's just the date that I need to make clear so I can figure out what birthday it was in the future.


And what better way than to make the date big and bold and smack it right in the middle of the page?! I'm deeply in love with the new Jack number stamp, the size and font are perfect!


I didn't intend for my third layout to be a double-pager. I completely finished the right hand side as my layout and left the journaling until last. I had planned to add a couple of lines underneath my title and call it done. I'm not sure why it didn't click earlier that I was going to have wwaaaaayyyy too much to say on the topic of breastfeeding but it's obvious that I do. LOL!! So I ended up writing out everything I wanted to say (for now) and printing it on another piece and then tried to match up embellishments so that it seemed like a cohesive double layout.


That might help explain why there's two "happy's" as well. The little blue stickers on the pineapple tag spelling out happy above the glittery blue ones was my original title. When I decided to go ahead and add another glittery 'happy' on my second page to draw them together I couldn't peel these ones off without ripping the tag slightly. So the two happy's were there to stay!


The double layout was created exclusively with products from the Add On Kit LOL, the Embellishment Kit BRB and a couple of printable journaling cards.


My fourth and final layout (for the reveal anyway) came about when I decided I really needed to test out a couple of the new dies that are being released. The new set of Emoji dies are super cute and the progression of shock, grimace and cool-as-a-cucumber faces actually suited my layout subject perfectly. As you can tell by my lengthy journaling once again, I needed to unleash a few thoughts on my recent job hunting adventure and those emoji faces really help tell the story.


The assortment of arrows in the top left corner of my layout are another set of dies and I know these are going to come in handy a lot, especially when I do things like my Bible Journaling. I'm always tucking in arrows there, pointing to verses and whatnot. 


Anyway, that's it from me right at this second. The reveal is live and there's plenty more fabulous new products hitting the shop as well. I've got a couple of tutorials going up on the Studio Calico blog this month too. The first one is up already and shares my hints and tips for using that Block Wallah stamp that comes in the kits. But watch out for another one coming soon too.


Happy Scrapping
Photobucket

Sunday, September 27, 2015

Jot Magazine Issue 11 - part 1

Earlier in the month the latest issue of Jot Magazine was released and I just realised I've been a little remiss in sharing my layouts with you here on the blog. Sorry!


Jot Magazine is a free online publication that's dedicated to story telling and memory keeping. As a Jot Girl I have the honour of making projects for the specific galleries ahead of time. It's a bumper issue this time around with over 190 pages of inspiration and I've got so many layouts and cards in it that I thought I should break it up over two separate posts for you ;-)


The first gallery I quickly signed up for was the 'my favourite photo' gallery. I mean, how easy to scrap your most recent favourite photo?! As you can imagine, the hard bit was trying to narrow down what photo I wanted to scrap, but after I chose this one it came together quickly. 


It's a hybrid layout and I used a digital template that Shanna Noel designed for Studio Calico last year (no longer available sorry) to cut out the different sections on my Silhouette.


The photo makes me giggle because in my mind Judah and his bear seem to have the exact same expression on their face! I enlarged the photo, converted it to black and white and printed it directly onto textured cardstock which gives it a rather interesting worn look.


Next up we have the card I made for the Mixed Media gallery.


To be honest it's been a little while since I got my mixed media supplies out since I've been sticking to cleaner Project Life spreads recently. But it was good to get a little messy again and spread some texture paste through a stencil. I have learned though that even if I'm using 'arty' techniques I still like to have my paper layers in straight lines so it doesn't feel too out of control for my taste ;-)


I'm really loving these colours too - feels very springy!


And my last share for today is this layout I made for the Type gallery. The idea was to include elements like typewriters, typed text etc etc.


My starting point was this old October Afternoon paper with the ladies sitting at their desk typing away. After watching lots of Mad Men recently it made me think of how far the concept of a 'career woman' has come since these days, and that got me thinking about my own personal struggle of trying to balance my career with my family.


As you can see, I had quite a bit to say on the matter! It seemed apt that I present it as though they are typed notes - plus the small font allowed me to say even more. Ha!


I'll be back to share the rest of my projects real soon. But in the meantime you can download the latest copy of the FREE Jot Magazine here.

Photobucket

Wednesday, June 25, 2014

What's Old is New Again

Riding on the heels of my hybrid success last month (it was the first time I'd touched the idea... and I fell head over heels in love) I decided I needed to invest a bit of time in learning some 'proper' techniques. So I've been taking the Digital | Beyond the Basics Class at Studio Calico and it's been really inspiring in so many ways. Some are a little surprising!

 photo 56A3FAB5-6B40-4FB1-8227-8D0E29761140.jpg


Because I don't think there will ever come a day when I want to go purely digital, so it's been about incorporating different digital techniques into my normal scrapping routine. Last week for example I set myself a personal challenge to dig out one of the oldest Studio Calico kits I own (Handmade from November 2011) and breathe a bit a new life into it.

I noticed that coincidentally the kit coordinated nicely with the Printables from the free Digital Basics Class, and the digital papers from the Beyond the Basics Class. So I printed them all out for a start. Then I decided to use one of the digital templates not as it was intended but rather as a sketch to base my page design on. I printed that off too for ease of reference.


And here's the layout I put together really quite quickly using a good mix of the old kit and the new digital printables and paper which helps keep the page looking reasonably fresh and modern. Then again, that's one of the advantages of the Studio Calico kits... they rarely seem to go out of style.


Last week I was the Guest Instagrammer on the Studio Calico account and I posted a quick video of the making of this layout. You can check it out here if you like:
http://instagram.com/p/pboytPBMDT/


And if you're interested in finding out more about what's really going on in the Digital | Beyond the Basics Class it's not too late to sign up. I am learning soooo much and I really do highly recommend it. I've barely scratched the surface of the possibilities and techniques I'm discovering, and I'm having a bunch of fun doing it!
Photobucket

Wednesday, May 28, 2014

Hello Hello Reveal

If you're a Southern Hemispherian like me, and you're dreading the imminent winter season, instead dreaming of the warm tropical summers, then the Studio Calico Hello Hello kits are just what you need to bring a little sunshine into your life ;-) Here's what the Main Kit looks like...


And here's what all the kits look like "in real life." This video will take you through all the contents of my Scrapbook Kit, as well as the 3 Add On kits.... as perceived/performed by my husband!! Yes, that's right - instead of me opening up the kits and showing you each piece by piece I thought I would ask The Man to do it. (Actually, in all honesty, it was his own suggestion. I think he secretly wishes he received packages full of pretty things every month)


Speaking of The Man, my first layout I made this month with the 'Main Kit Only' even features him! Headless... but nonetheless, that's still The Man.

'Lunch Date' Supplies: Hello Hello Main Kit, Printable Labels, Printables by In a Creative Bubble


There's 2 key feature points on this layout, possibly 3. Firstly, it's that city skyline paper. It really caught my eye as I flicked through the kit contents and I knew I wanted to do something special with it. It seems I'm not the only one, half the Creative Team seemed to have similar ideas! Secondly it was all about those foam stamps. I used the "YES" with Clean Slate ink to stamp repeatedly in my masked-off area under the buildings. The foam stamps take the ink really smoothly. And the third thing might just be those acetate alphas. A big bold font I really love!

'Hi' Supplies: Hello Hello Main Kit, Printable Labels, Printables by Hello Forever

Ironically, with all the bright colours in the kit, I wanted my second 'Main Kit Only' layout to be quite a subdued, stark, almost B&W affair to match that funny photo of my youngest putting on a shadow-puppet show. I used the masks in the kit to create more circles on my page, and chose circle stickers to also mimic the photo. I couldn't resist the sprinkling of gold from those labels either.


The first Add On I wanted to get stuck into was the 'Ni Hao' kit. Two sets of alphas (yay!) that yellow chevron bag and the red doily were my favourite bits.


So I put them all to good use on my double page spread 'Ripe'.

'Ripe' Supplies: Hello Hello Main Kit, Ni Hao Add On, Bonjour Add On, 
Printables by Hello Forever, Cutting Files by Hello Forever

I decided for my double this month I wanted everything to go BIG! Firstly I printed my big photo directly onto the ledger paper (the b-side of that red circle pattern) just for something a little different. It adds a bit of extra pattern and layering without being too overwhelming I think. 


And then I up-sized one of the Cutting Files onto a full page too. I reckon this would make a fun journaling card too, but for now it also makes a great big bold statement. And I'm cool with that.

Next, I wanted to play with the Add On called 'Hola'.... mainly because of that blue script paper by We R Memory Keepers. So awesome! It's b-side has the same pattern but in Spanish which makes it even more perfect for this kit ;-)


So I pretty much just wanted to use that paper, and then matched it with some fun bright layers from the Main Kit as well as a sprinkling of embellishments from the Embellishment-Only kit (which I'll get to in a second!)

'You & Me' Supplies: Hello Hello Main Kit, Hola Add On, Ni Hao Add On, 
Bonjour Add On, Printables by Hello Forever

The photos aren't of me (obviously), but of my friend Mei. She's one awesome friend and one amazing doctor, and I wanted to cheer her up with this bright happy layout of her and Hubby getting all sillified at a wedding. I do love some good photo-booth pics and these were too fun to pass up. Don't worry.... she knows she's going public and she's ok with that idea :-)

Now let me introduce you to my favourite Add On this month which is the Embellishment Only kit called 'Bonjour'. Isn't it just perfect in every single way?


You can pretty much see these embellishments sprinkled throughout all my layouts, or at least all the other four which weren't 'Main Kit Only' and I seriously love every single element in this kit. I've got plans for that balloon-dog mask let me assure you ;-)


'Be Bright' Supplies: Hello Hello Main Kit, Bonjour Add On, 
Printables by In a Creative Bubble, Printable Labels

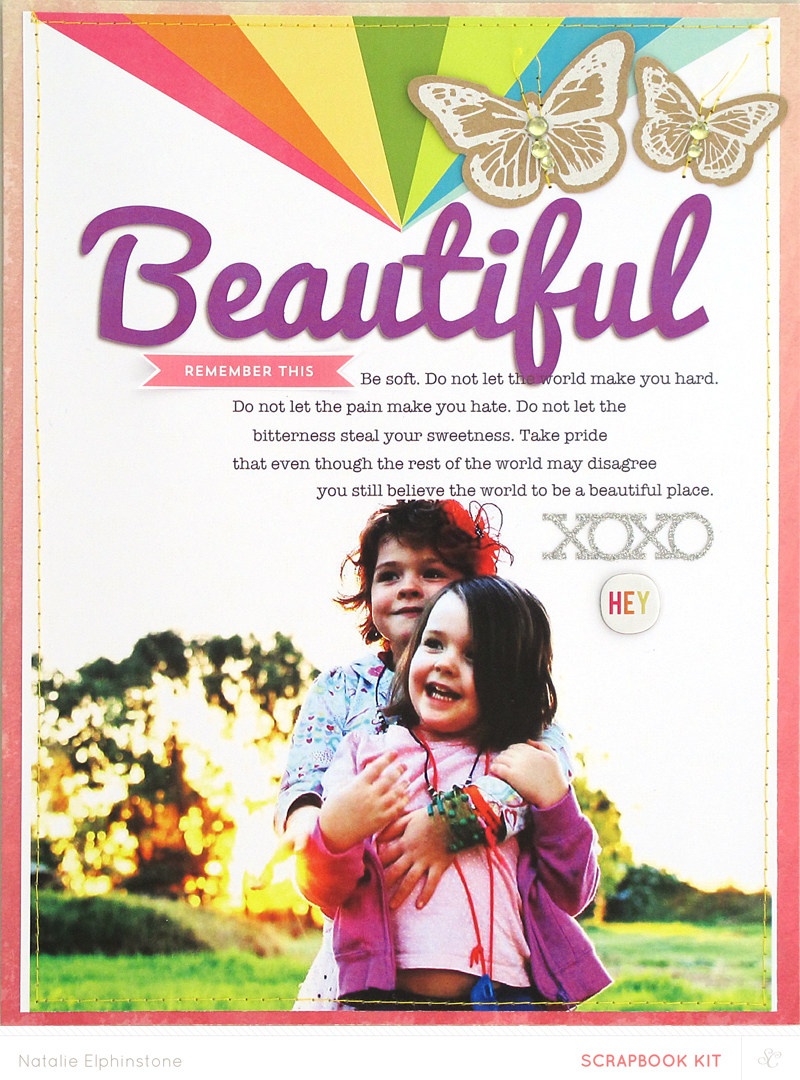
On 'Be Bright' I used up another one of those kraft butterflies, and some of the puffy stickers. But mainly this layout was all about making a whole rainbow of bright happy colours, which was achievable just with papers from the Main Kit can you believe? Obviously I went with the whole ROYGBIV thing, but with this many colours to choose from you could go in sooo many directions.


There's a good dose of Printables in this layout too. All the labels come in a matching rainbow of colours, and the others which you see in the detail-shot above are from the Printables designed by In a Creative Bubble. Yep... still loving me some Printables!


'Beautiful' Supplies: Hello Hello Digital Templates, Bonjour Add On

But it was the layout above which has rocked the scrappy world in which I live. Oh my gosh! Why haven't I succumbed to digital templates before? I'll tell you why! It's because I thought "I don't do digital scrapbooking" and "that all seems too technical".


But I was unable to resist the charms of Shanna Noel's digital Templates for this month - all those rainbowy hearts was too much to bear. And taking the Digital class has helped get my confidence up. So turns out they're really easy.... and really awesome too. I took a template, changed it up just a bit so my photo became a large focus of the page and adjusted the colours a little. Then I printed it out (because I still think "I don't do digital scrappbooking") and added a few more embellishments from Bonjour to it so it's still nice and textural.


And now I'm pretty sure Hybrid Scrapbooking is going to become my new 'thing'!! This is definitely my favourite layout from this month, and I can't wait to see what the templates are like next month. I'm so inspired!

So the Creative Team Gallery is up, the Kits have gone live to the general public and the shopping has begun. Let me know what you got!

Photobucket

Hello Hello Supply List:

LinkWithin

Related Posts with Thumbnails