This is a technique loved by collage artists, and from whom I've learnt it from. I hope this tutorial explains it easily for everyone else. The idea is to transfer one paper image onto another one whilst making it somewhat translucent so it blends better into the background, rather than just pasting a cut out image onto your page.
Step 1. Collect all necessary ingredients.

Your 2 main ingredients are of course, the base cardstock (or art journal, or mixed media piece, basically whatever you want to transfer onto) and the image you want to transfer. Keep in mind that the image you transfer will end up reversed, so don't use anything with words (unless you don't think it matters, like I did with this piece of music).
You also need gel medium, a paint brush, a brayer (I use an old credit card) and water to spray (I use an empty kid's hair de-tangler bottle!)
2. Apply your gel medium

Paint your gel medium onto your base cardstock making sure you put on a reasonably thick layer, a bit like spreading your butter onto toast (unless you're on a diet!). Spread the gel medium further than just the area of your transferred image because it will also act to waterproof the card which will become important later.
3. Place the image on your card

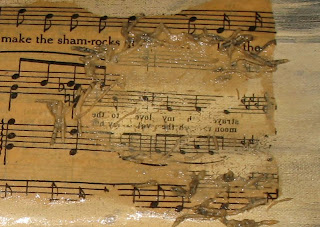
This is important - place the image you want to transfer FACE DOWN onto the gel medium layer. It's hard to tell in my picture because both sides of my music paper have music on it, but the side that I want to be able to see later on is stuck onto the gel medium.
4. Brayer

Use your brayer (or credit card) to firmly smooth down the image and really make it stick into the gel medium. Try not to drag the gel medium from the background card on top of the image you are trying to transfer as this will make it harder, if not impossible, to remove the excess paper later on.
5. Let it dry.
Make sure you let this dry properly. No cheating and trying to rush the process. Leave it alone!
6. Spraying and Rubbing

Now the fun begins! Spray your image with water - get it reasonably wet but not saturated. You can always spray more water as you go. Let it soak in for a few seconds, then start rubbing away at the paper with your fingers. You'll soon start to see the 'crumbs' of paper coming away leaving the image behind.

Keep rubbing, rubbing, rubbing until you've removed enough paper to make you happy. Remember, we're not after a PERFECT transferred image, the point is to make it look a little shabby and worn so it doesn't matter if parts of your image come away as well. But the more paper you rub away the more translucent the end result will be and the more 'blended in' it will look.
7. The End Result

You can see in my photo that parts of my transferred image have come away as well, and they're actually in the form of my original brush-strokes of gel medium which means I didn't put a thick enough layer on to begin with. But never mind, it's all in the process of learning right?
8. Drying Time Again
This is equally important drying time as the first time so don't start making your layout yet. Let it dry properly because you'll likely notice that as it dries the image starts to become more opaque again, and you'll probably want to go back with the water and rub away at those areas some more.
9. Now create!

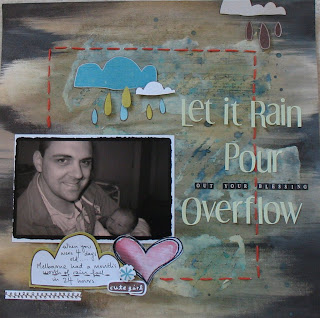
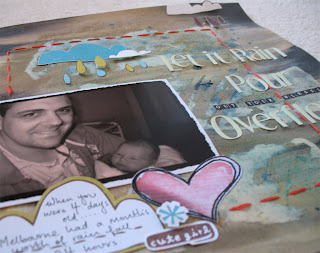
I sprayed my image with some glimmer mist and then created my layout with Crate Paper embellishments and Arctic Frog alphas.

What I've learnt so far from my attempts at Gel Transfers........
- If you use a lighter image on a darker cardstock you'll get a lot more of an obvious opaque outline. One way to conquer this is to then go over it all with some spray ink or paints as another layer. Alternatively, try and match the colour of the cardstock and the background of your transferred image a bit closer.
- If you keep on rubbing too much you'll likely rub away some skin off your fingers too! Typing this long blog post hurts a little!!

Awesome tutorial and I LOOOOOOVE the page you've kreated!!!!
ReplyDeleteLike the page and tutorial too! Thanks!
ReplyDeleteOh this is just fabulous! thanks so much for the tutorial!
ReplyDelete